Introduction
It’s summer of 2021 and after waiting for about six months, my Quad Cortex finally arrived. I wanna share some tips and tricks with y’all, things that took me more than half an hour or so to figure out.
Power Supply
The power supply that comes with the unit rates 3A at 12V. However, that’s just what the power supply is capable of delivering, not what the unit actually draws. I measured the actual current draw in this youtube video. In an average kind of situation, the unit draws around 1.2A. With the highest display brightness and with a patch using up 80% of DSP load, current draw goes up to around 1.8A.
I’m currently operating the QC with a Cioks DC7 power supply by connecting four outlets at 12V and 500mA each with three current doubler cables. In most situations, one of the four outlets is off, which the DC7 indicates by the LEDs on each individual outlet.
Routing
Limitations of the QC in terms of routing:
- Only two splits/mixes are available, one for rows 1 & 2 and one for rows 3 & 4
- The QC assigns DSP cores to rows 1/2 and 3/4. Meaning that if there’s no DSP power left in a particular spot, you can try to move the blocks to the other rows/cores.
- You can use the same input in multiple rows
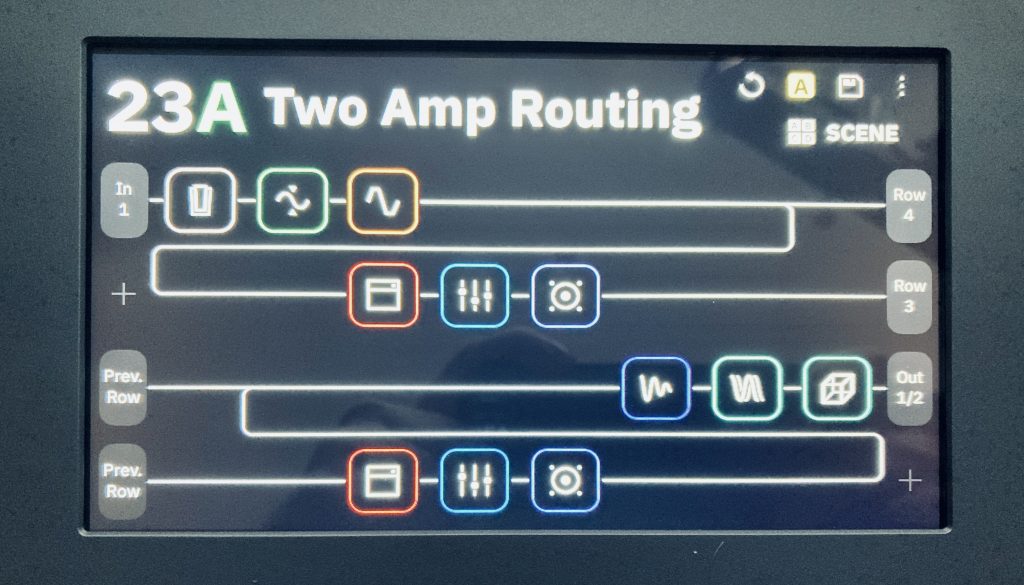
I’m going to address this from a guitarist’s perspective. Most of the time, we have something like a pre section with overdrives, then a split and two amps+cabs and finally a mix followed by a post section with modulation, reverb and delay. You can easily achieve a setup with two amps as follows:

The two amp setup seems like overkill first, but it is well balanced over the DSP cores. There’s the pre-section with the first amp+cab section on rows 1/2 and the post-section with the second amp+cab on rows 3/4. However, everything time based takes up the most DSP power. So if you have lots of blocks in the post-section, it might become better to have the amps and cabs in rows 1/2 completely and everything else in rows 3/4.
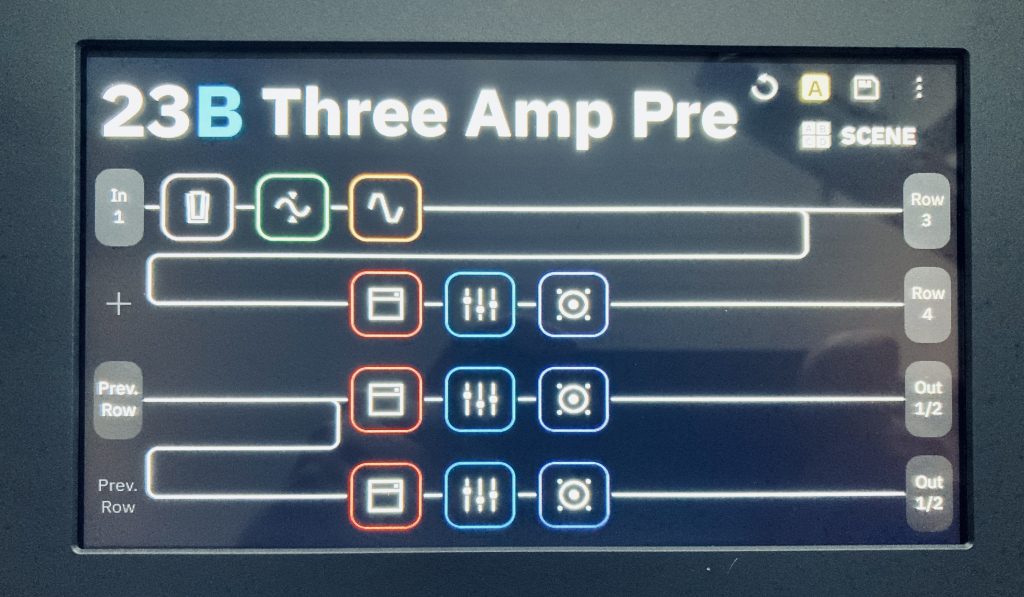
However, let’s assume you want to create a virtual setup with three amps and cabs. Unfortunately, the QC doesn’t provide a three way split. But first, let’s consider the following layout:

You can’t build this setup completely, but I found three workarounds that will suffice most applications.
1. Common Pre-Section


The problem with this approach is that you’d have to repeat time based effects of the post-section and time based effects are the most DSP power intensive. If you’re after a wet/dry/wet setup, this could be what you want.
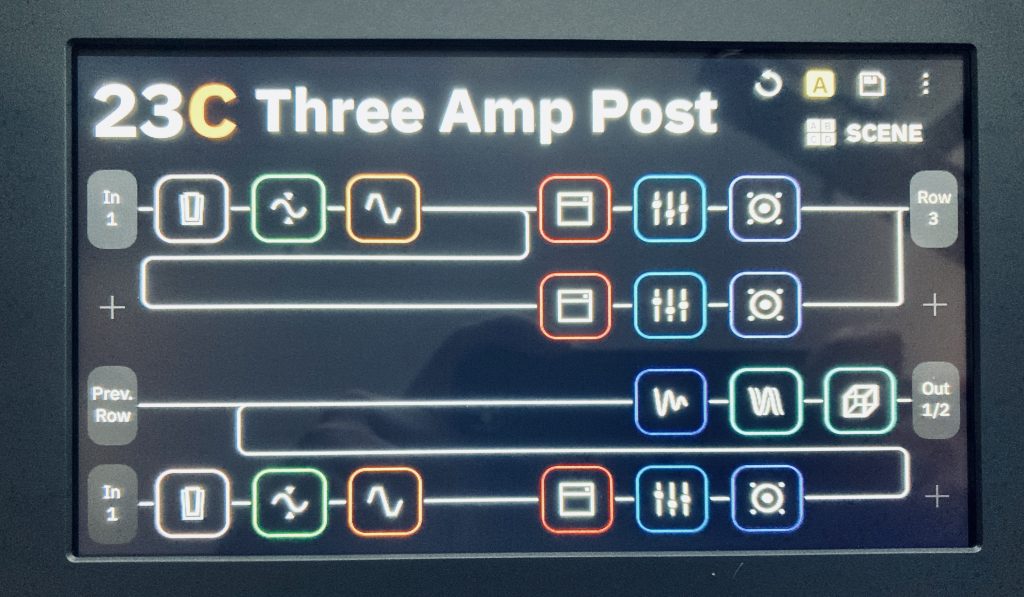
2. Common Post-Section


This is my second favourite approach, because it provides a common post-section. Having all time based effect blocks only once simply saves DSP power. You have to repeat certain overdrives. But to be honest, in my personal example, the third amp didn’t sound as good with one of the overdrives, so I ended up removing it.
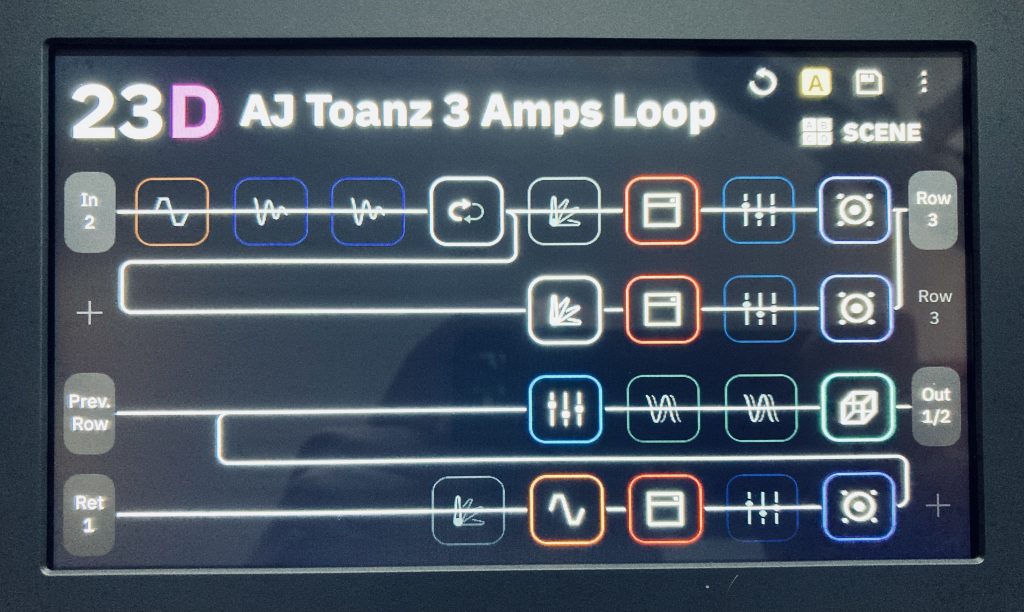
3. Common Pre- and Post Section Using A Patch Cable
Yes, you’re reading right. I actually figured out a way to get the three way split with both a common pre- and post section. However, it will cost you one of the external fx loops.
My approach is to add another split and mix, but by using two additional blocks. An fx send block realizes the split, while an fx return does the mix. Here’s a screenshot:

The first split happens in row one, position 4, which is an fx Send 1. The return of this loop comes back in the beginning of row 4 with the “Ret 1“.
Note: To make this work, simply jump send 1 and return 1 with a TRS patch cable.
The only things I am unsure about are:
- mono vs. stereo: I used a TRS patch cable without knowing if there is actually a stereo signal on the fx loops. Only thing I know is that the physical ports are TRS.
- physical vs. virtual routing: Maybe the internal virtual routing transmits more than just audio signals. Something like commands or monitoring. An external physical routing would cut off those signals.
4. Do you actually need 3 amps?
In my example, the guitar player whose sound I tried to replicate actually uses the same amp with the same settings twice. He plays one of the amps through a MESA 4×12 guitar cab and the other one through a MESA 2×15 bass cabinet. This enables me to reduce the setup from three to two amps. I add the amp only once to the grid. For the cab I use one block, but with IRs (impulse responses) instead of the on-board speakers and mics. This allows me to have an IR of the guitar cab on one side and an IR of the bass cab on the other side and then mix them together to taste.
Btw: having a MESA 4×12 and 2×15 IRs mixed together sounds absolutely stellar!
Levels
Coming up. I’m still struggling with levels myself, especially in the post sections.
